Description
Professional Android Open Accessory Programming with Arduino
Author: Goransson Andreas
Language: English
Approximative price 42.19 €
In Print (Delivery period: 12 days).
Add to cart
Publication date: 01-2013
Description
/li>Contents
/li>
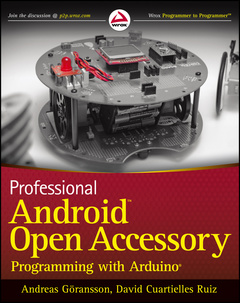
Learn how to control your home or car from your Android smartphone – air conditioning, lights, entertainment systems, and more! Android Open Accessory is a new, simple, and secure protocol for connecting any microcontroller–empowered device to an Android smartphone or tablet. This Wrox guide shows Android programmers how to use AOA with Arduino, the microcontroller platform, to control such systems as lighting, air conditioning, and entertainment systems from Android devices. Furthermore, it teaches the circuit–building skills needed to create games and practical products that also take advantage of Android technology. Introduces Android Open Accessory and shows how to set up the hardware and development environment Explains how to code both Android and Arduino elements of an accessory Features four complete projects developers can build using various sensors and indicators/actuators, including source code Gives Android developers the tools to create powerful, sophisticated projects Professional Android Open Accessory with Android ADK and Arduino opens exciting new opportunities for Android developers.
INTRODUCTION xxi PART I: WELCOME TO THE WONDERFUL WORLD OF ACCESSORIES CHAPTER 1: INTRODUCTION TO ANDROID OPEN ACCESSORY 3 I, Android 3 The Three Laws of Android 4 The Android Philosophy 6 Other Popular Systems 7 Preinstalled Applications 8 What Is Android Open Accessory? 9 Android USB in Short 9 Developing Android Accessories 10 What Is Arduino? 10 How Does AOA Work with Arduino? 11 What Can You Do with AOA? 12 What Can’t You Do with AOA? 13 Why it Matters that Google Chose Arduino 14 Summary 15 CHAPTER 2: SETTING UP THE (ARDUINO) HARDWARE 17 Choosing Microcontroller Boards for Your Project 18 One Platform, Many Architectures 18 Shields 26 Choosing Sensors and Actuators for Your Project 29 Sensors 30 Actuators 34 Powering up Your Project 38 Ways to Power up Your Project 38 Arduino Feeding Your Phone 41 Summary 41 CHAPTER 3: UNDERSTANDING DATA COMMUNICATION 43 Data Communication Basics 43 Protocols 44 Terminology 45 Hardware Layer for the Communication Protocol 47 ADB 47 Accessory Mode 48 Host Mode 48 TCP/IP 50 Audio Port 52 Bluetooth Options 53 Introducing MQTT 54 Heads Up! 55 MQTT Messages 58 P2PMQTT: A Modifi ed MQTT 63 Establishing a Connection 63 Subscribing to a Topic 63 Publishing a Message 64 Disconnecting 64 Summary 64 CHAPTER 4: SETTING UP DEVELOPMENT ENVIRONMENTS 67 Setting up Android Development 67 Android Development Environment 69 Hello, Android! 79 Setting up Arduino Development 80 Arduino Development Environment 80 Hello, Arduino! 82 Hello Open Accessory App 85 The Temperature Sensor 85 The Arduino Sketch 87 The Android Project 88 Ready to Go 88 Summary 89 CHAPTER 5: CREATING THE ACCESSORY LIBRARY 91 Getting Started with Android Libraries 92 Building the P2PMQTT Library 92 Preparing the Library Project 92 Sketching the API 93 Implementing MQTT 94 Decoding MQTT 108 Managing Open Accessory Connections 117 Creating the Connection Class 117 USB Connection 119 Bluetooth Connection 123 Creating the Connection 126 Summary 131 CHAPTER 6: USING YOUR ACCESSORY LIBRARY 133 Using Custom Android Libraries 133 The WroxAccessories Library 134 Building the Mini Projects 137 The LSMSD 137 The Parking Assistant 145 The Basic Robot 154 The Sampler 164 Summary 170 CHAPTER 7: DIGITAL ARDUINO 171 Digital Actuators 172 The Blinking LEDs 172 Controlling a Desk Lamp — The Relay 178 Digital Project 1: Large SMS Display 182 Writing the Arduino Program 186 Digital Sensors 190 Buttons and Switches 190 Tilt Sensor 194 Digital Project 2: Small Sampler 197 Summary 202 CHAPTER 8: ANALOG ARDUINO 205 Analog Actuators 206 The Piezo Element 207 Motors 211 Analog Project 1: The Basic Robot 215 Analog Sensors 223 Potentiometers 224 Ultrasound Sensors 228 Analog Project 2: The Parking Assistant 233 Summary 239 PART II: PROJECTS CHAPTER 9: BIKE RIDE RECORDER 243 The Concept Behind Bike Computers 244 The Design Brief 245 Working with the Arduino Side 246 Creating the Hardware and Mechanics 247 Programming the Bike Computer 251 Building the Android App 259 Creating the Bike Ride Recorder Project 260 Creating the User Interface 261 Setting up the AoaService 266 Building the Main Menu Activity 271 Building the Recording Activity 271 Building the List Recordings View 282 Building the Playback View Activity 285 Making Further Improvements 290 Mechanics 290 More Sensors 290 Making a Better App 290 Summary 291 CHAPTER 10: KITCHEN LAMP 293 The Concept 293 The Design Brief 295 The Arduino Side 296 Hardware 298 Software 301 Building The Android App 307 Sketching the Application Layout 307 Create the Kitchen Lamp Project 308 Create the User Interface 308 Building the Kitchen Timer 313 Responding to Phone Calls 315 Listen for SMS Events 319 Connecting to the WroxAccessory 322 Further Improvements 325 Product–ready Embedded System 326 Making a Better App 326 Summary 327 CHAPTER 11: MR. WILEY 329 The Concept 330 The Design Brief 331 The Arduino Side 332 The Hardware 332 The Firmware (on the Robot Board) 335 Creating Software for the Mega ADK Board 340 Building the Android App 342 Sketching the Application Layout 343 Creating the Mr. Wiley Project 343 Building the Computer Vision Algorithm 348 Connecting to the WroxAccessory 358 Making Further Improvements 364 Electronics 364 Making a Better App 364 Summary 364 INDEX 365
© 2024 LAVOISIER S.A.S.
These books may interest you

Professional Android 46.98 €


