Description
Autodesk Maya 2014 Essentials
Autodesk Official Press
Author: Naas Paul
Language: English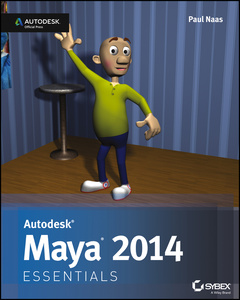
Subject for Autodesk Maya 2014 Essentials:

Publication date: 07-2013
304 p. · 18.8x23.2 cm · Paperback
304 p. · 18.8x23.2 cm · Paperback
Description
/li>Contents
/li>Readership
/li>Biography
/li>
The premiere book on getting started with Maya 2014 Whether you′re just beginning, or migrating from another 3D application, this step–by–step guide is what you need to get a good working knowledge of Autodesk Maya 2014. Beautifully illustrated with full–color examples and screenshots, Autodesk Maya 2014 Essentials explains the basics of Maya as well as modeling, texturing, animating, setting a scene, and creating visual effects. You′ll absorb important concepts and techniques, and learn how to confidently use Maya tools the way professionals do. Each chapter includes fun and challenging hands–on projects, which you can do as you go using the downloadable files from the book′s website. They include starting and ending files, so you can compare your results to how professionals do the projects. This information–packed Autodesk Official Press book also helps you prepare for the Autodesk Maya 2014 certification exams. Helps beginners and those migrating from other 3D animation and effects programs get up and running on Autodesk Maya 2014 Features step–by–step tutorials, hands–on exercises with downloadable files, and four–color examples and screenshots Covers modeling, texturing, animating, visual effects, lighting, compositing, setting a scene, and more Written by an Autodesk Authorized Author and is an Autodesk Official Press Autodesk Maya is the industry–leading 3D animation and effects software used in movies, games, cartoons, short films, commercials, and other animation Get firsthand experience with Maya 2014, as well as an initial start on preparing for the Autodesk Maya 2014 Certified Professional exam, with Autodesk Maya 2014 Essentials .
Introduction xvi Chapter 1 Understanding the Maya Interface 1 Exploring Interface Elements 2 Views 2 Time Slider 3 Range Slider 4 Toolbox Window 4 Shelves , 5 Moving Views and Manipulating Objects 5 Using Maya Windows and Menus 8 Setting Preferences 10 Preferences Window 10 Settings Used for the Tutorials , 12 Getting Help , 12 Chapter 2 Creating Your First Animation 15 Using Good Scene–File Management 15 Creating and Animating a Bouncing Ball , 18 Selecting a View and Turning On the Resolution Gate , 18 Creating a Ball , 19 Setting Movement Keyframes 21 Refining Movement in the Graph Editor 24 What&rsquo,s Wrong with the Way My Ball Is Bouncing? 24 Adjusting Spline Tangents 25 Breaking Tangents for Fast Direction Changes , 26 Using Animation Principles to Improve Your Work , 28 Squash , 28 Stretch , 29 Creating a Playblast of Your Animation 31 Chapter 3 Modeling with Polygons, Part 1 35 Understanding Polygons 35 Vertex , 35 Edges , 36 Constructing a Good Model 37 The Importance of Quads , 37 The Problem With Ngons 38 Getting Started and Using the Main Modeling Tools , 38 Setting Up View Planes , 39 Starting with a Cube , 42 Extruding Faces 43 Box Modeling and Building a Character , 45 Refining the Character&rsquo,s Geometry 55 Using the Insert Edge Loop Tool 56 Using the Split Polygon Tool , 60 Shaping Your Character 65 Chapter 4 Modeling with Polygons, Part 2 69 Creating Edge Loops 69 Getting Started: Deleting Edges and Setting Tool Options 70 Building Your Edge Loops 72 Adjusting Vertices, Polygons, and Edges, and Adding Details , 80 Creating Eyebrows 86 Chapter 5 Modeling with Polygons, Part 3 91 Refining and Cleaning Up 91 Adding Geometry for Good Deformations , 91 Cleaning Up the Model 96 Positioning Your Character for Rigging , 98 Adding Eyeballs , 100 Mirroring Your Model 102 Deleting History , 106 Chapter 6 Sur facing Your Character 109 Creating a Surface 109 Using the Hypershade Window , 109 Using the Marking Menu 114 Laying Out UVs 117 Understanding the UV Space 117 Performing the UV Layout 118 Texture Mapping 126 Creating a Color Map 126 Applying Your Color Map 128 Applying Additional Surfaces 132 Chapter 7 Get ting Bent Out of Shape: Blend Shapes 135 Understanding Blend Shapes and How They Work 135 Deformer Order , 135 Blend Shapes , 136 Creating Deformers for Your Character 137 Planning for Facial Deformers 138 Creating Your Facial Blend Shapes 139 Setting Up the Blend Shape Interface , 144 Chapter 8 Dem Bones: Set ting Up Your Joint System 147 Understanding How Joints Work , 147 Building Joint Chains 148 Picking the Correct View for a Chain , 148 Starting in the Middle (of the Character) 148 Naming Joints , 153 Creating the Leg Chain , 154 Creating the Arm Chain , 157 Putting It All Together , 162 Mirroring Joint Chains , 162 Using Variables for Naming 163 Connecting All Your Chains , 165 Putting It to Use: Connecting the Joints to Your Model 168 Using Smooth Bind , 168 Skinning Joints to Your Model , 168 Parenting the Eyes to the Skeleton , 170 Chapter 9 Weighting Your Joints 173 Understanding Joint Weighting and Why It&rsquo,s Important , 173 Joint Influence on Deformation , 173 Why You Used the Options You Did at the End of the Last Chapter , 174 Adjusting Weights 174 Strategies for Assigning Weights 175 Paint Skin Weights Tool&mdash,Add , 175 Paint Skin Weights Tool&mdash,Replace , 176 Painting Your Weights 176 Mirroring Weights , 183 Chapter 10 Rigging Your Character 185 Understanding Basic Rigging Concepts 185 Forward Kinematics 185 Inverse Kinematics , 186 Setting Up the Leg Controls 186 Creating Leg IK Chains 186 Creating an External Control Handle 190 Connecting the IK Chains to the Handle 192 Using Pole Vector Constraints for Controlling the Knee 194 Setting Up the Torso Control 196 Creating the Torso Control Handle 196 Connecting the Torso Control 197 Setting Up the Character Control , 198 Creating the Character Control Handle , 198 Connecting the Character Control Handle 199 Creating a Custom Shelf 200 Chapter 11 Set ting the Scene: Creating an Environment 205 Building a Room 205 Creating the Floor and Walls 206 Texturing the Floor and Walls 208 Building Props 213 Creating a Table , 213 Creating a Poster , 217 Chapter 12 Making It Move: Animating Your Character 221 Setting Up Maya for Animation , 221 Setting Key Tangents 221 Creating a Camera and Turning On the Resolution Gate , 222 Locking Down the Camera , 224 Animating Your Character 226 Creating a Pop–Thru 226 Timing the Pop–Thru 230 Adding Breakdown Poses 231 Polishing the Animation , 233 Chapter 13 Let There Be Light: Lighting Your Shot 237 Understanding the Three–Point Lighting System 238 Key Light , 238 Fill Light 239 Rim Light 240 Using the Maya Lights , 241 Directional Light , 241 Spot Light 242 Point Light , 243 Lighting Your Scene 244 Placing Your Lights , 244 Setting the Intensity of Your Lights , 247 Casting Shadows , 250 Performing Light Linking , 252 Chapter 14 Rendering and Compositing Your Scene 255 Making 2D Images Out of 3D Scenes 255 Smoothing Your Model , 256 Setting Your Render Preferences 257 Running a Batch Render , 260 Finding Your Frames 261 Performing Compositing , 261 Compositing Your Frames 262 Using Other Compositing Options , 266 Appendix A Autodesk®, Maya®, 2014 Certification 269 Index 275
The primary audience: those new to 3D in general, and beginning Maya users specifically. The book appeals to an array of traditional artists, students, 2D artists, educators, and hobbyists. Students, teachers, and hobbyists alike will benefit from the book′s techniques and tutorials.
Paul Naas is a professional animator and educator. He runs the Multimedia and Computer Graphics program at Canada College in Redwood City, California, and has done animation work for companies such as Disney, Cisco, bZillions/C2 Gaming, and the Children′s Discovery Museum. He is also a professional cartoon artist. Paul has a Master of Fine Arts in Animation from the Academy of Art University, San Francisco.
© 2024 LAVOISIER S.A.S.